MODBUS Parameter
Creating Modbus Parameter
- In order to create the Modbus Parameter, choose a device (from the menu).
- Firstly, turn the settings mode on (on the top right corner).
- From the devices, choose the workspace you have created (of your choice).
- Next, choose the Modbus device you have created.
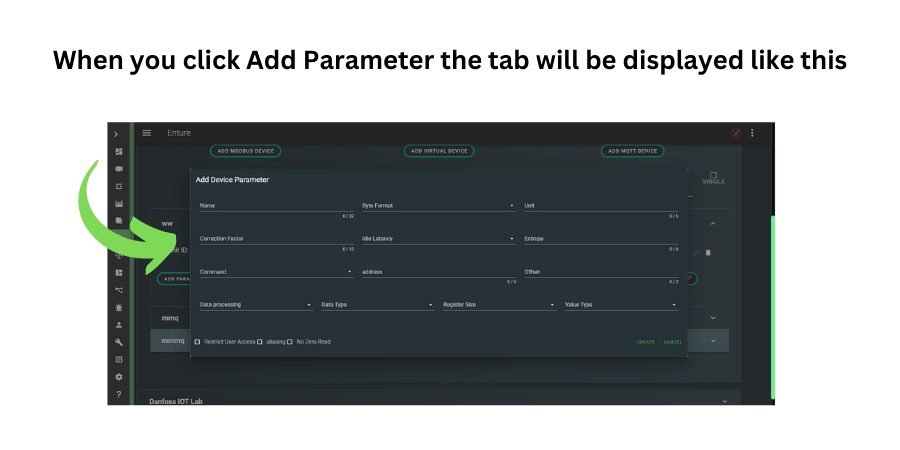
- Click ‘Add Parameter’ from the options available.
- You will see a slide open from the bottom (as shown below).
- Enter the details required in the slide such as:
- Name
- Byte format (Big Endian, Little Endian, Mid Big, Mid Little)
- Unit
- Correction factor
- Idle Latency (dropdown option available)
- Entropy
- Command
- Address
- Offset
- Data processing (Average, Difference)
- Register size (Short-16bit, Long-32bit)
- Value type (Unsigned Integer, Signed Integer, Float)
- Tick the checkboxes for Restrict User Access and Aliasing (if needed).
- Click the ‘Create’ button.
Edit/Delete the Modbus Device Parameter
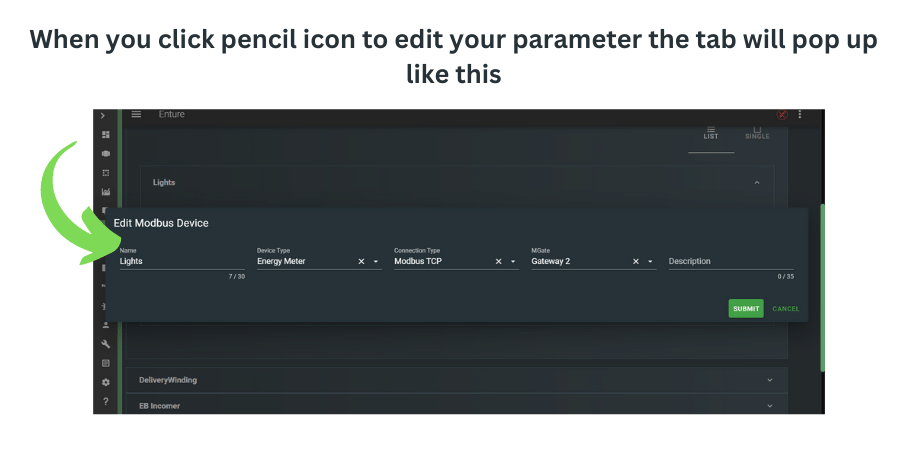
- To modify a Modbus device parameter, click the pencil icon next to the created parameter.
- Clicking the pencil icon opens a tab.
- Make the necessary modifications and click Submit to update the changes.
- To delete the parameter, click the delete icon next to the pencil icon.
- A message ‘Parameter Removed’ will appear.
Directions to Use
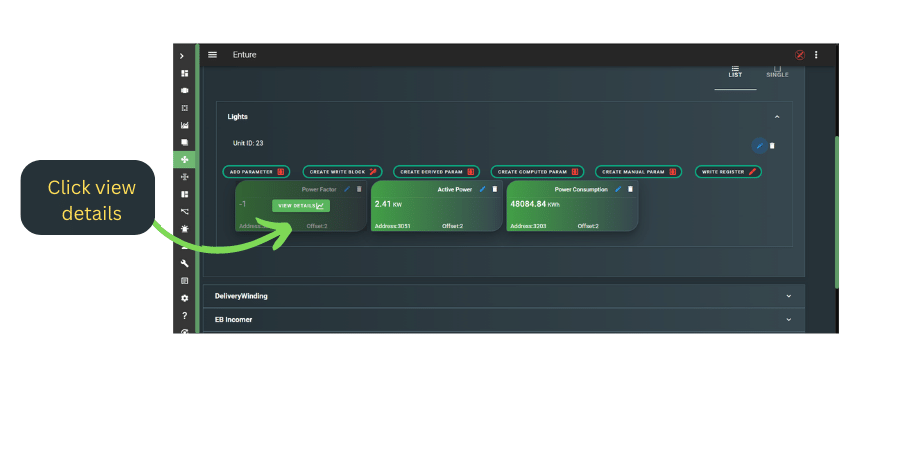
- Hover over the created Modbus device parameter to see ‘View Details’ (highlighted in green).
- Click ‘View Details’ to open the parameter details page.
- The page displays the parameter ID and a real-time graph.
- You can also see an ‘Add Trigger’ option (highlighted in yellow).
- Add a trigger from the dropdown and it will be applied to the parameter.
- To remove a trigger, click the cross icon next to the created trigger.
- A message ‘Trigger Removed’ will appear.
MQTT Parameter
Creating the MQTT Parameter
- Choose Device from the menu.
- Turn the settings mode on (top right corner).
- Select your workspace.
- Choose the MQTT device you have created.
- Click ‘Add Parameter’.
- A slide opens from the bottom.
- Enter the details required:
- Name
- Unit
- Correction factor
- Idle latency (dropdown option available)
- Entropy
- Identifier
- Data processing (Average, Difference)
- Datatype (Other, Voltage, Current, Power, PF, Harmonics)
- Tick the checkboxes for Restrict User Access and Aliasing (if needed).
- Click ‘Create’.
Edit/Delete the MQTT Device Parameter
- Click the pencil icon next to the created parameter to modify it.
- A tab opens where you can edit the parameter.
- Click Submit after making changes.
- Click the delete icon next to the pencil icon to remove the parameter.
- A message ‘Parameter Removed’ will appear.
Directions to Use
- Hover over the MQTT device parameter to see ‘View Details’ (highlighted in green).
- Click ‘View Details’ to open the parameter details page.
- The page displays parameter ID and a real-time graph.
- You can also see an ‘Add Trigger’ option (highlighted in yellow).
- Add a trigger from the dropdown.
- To remove a trigger, click the cross icon next to the created trigger.
- A message ‘Trigger Removed’ will appear.
